How to Use MAPLES OSM: Part 2 — Evaluating Answer Sheets
A complete guide to marking answer books in MAPLES OSM — the 3-panel evaluation interface, placing tick and cross marks, keyboard shortcuts, rejecting papers, reporting malpractice, and completing evaluation.

Overview
Once you've selected an answer book from your dashboard (see Part 1), you'll enter the evaluation view — MAPLES OSM's core interface where you mark student responses against an answer key.
The Evaluation Interface
The evaluation screen is divided into three panels:
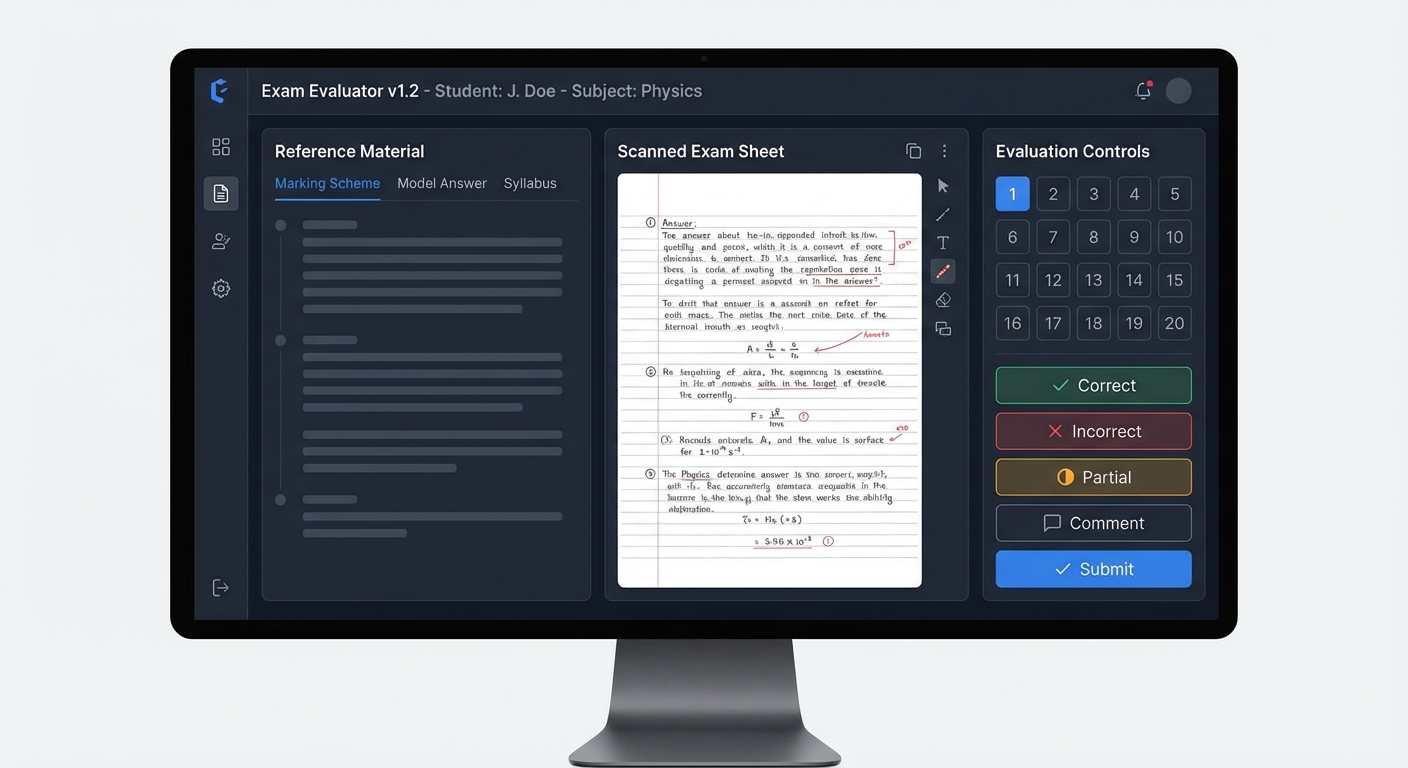
Left Panel — Reference Materials
The left panel gives you quick access to supporting documents:
You can show or hide this panel using the toggle button.
Center Panel — Answer Sheet Viewer
The main area displays the scanned answer sheet page. This is where you:
Right Panel — Question Grid & Marks
The right panel contains:
How to Mark an Answer Sheet
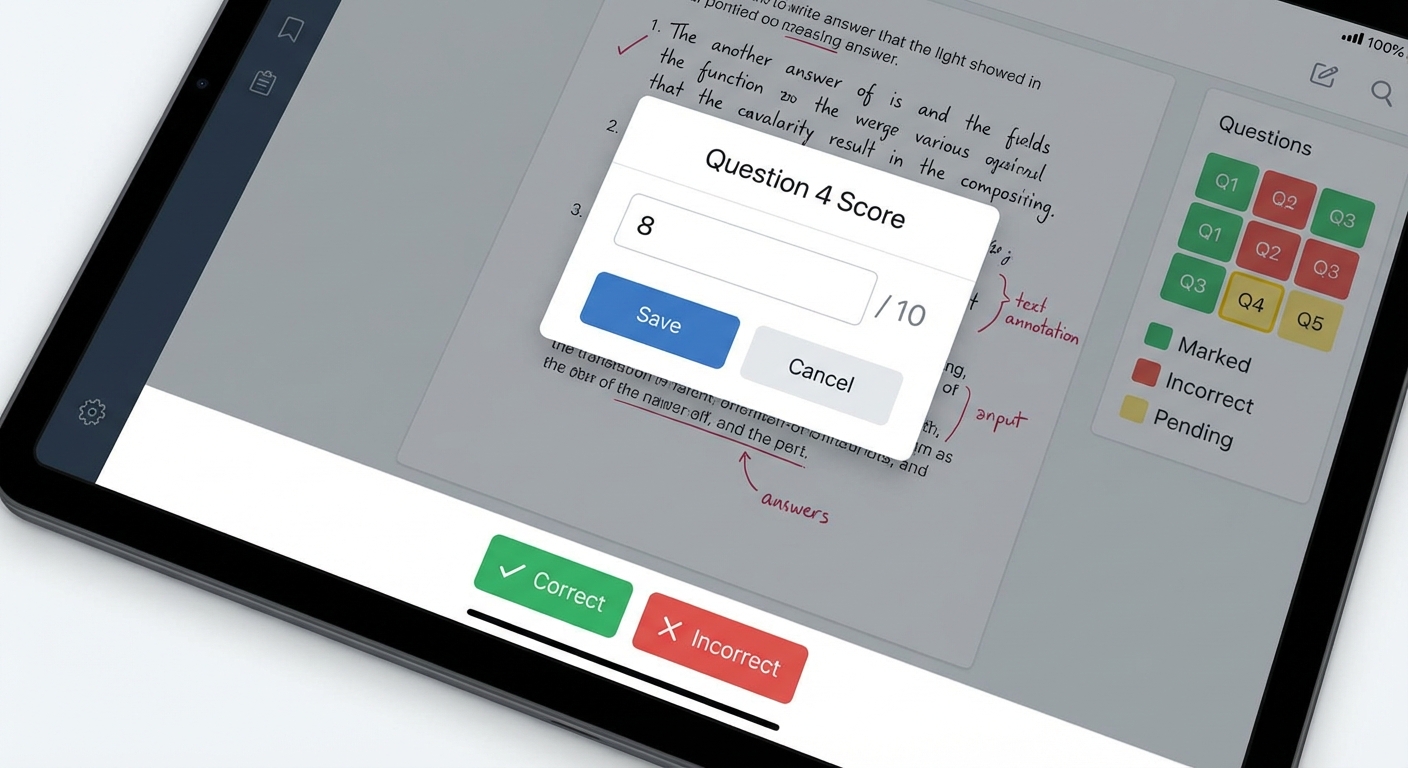
Step 1: Select a Question
Click on a question number in the Question Grid on the right panel. The selected question will be highlighted with a bold outline.
The grid uses color coding to show progress:
| Color | Meaning |
|---|---|
| Gray | Not yet evaluated |
| Green | Marked with a tick — marks awarded |
| Red | Marked with a cross — zero marks |
| Yellow/Orange | In progress |
Step 2: Choose Your Mark Type
Use the marking controls to select:
Step 3: Place the Mark
Click on the area of the answer sheet image where the student's response is located.
Step 4: Review & Adjust
Navigating Between Pages
Use the Previous and Next buttons below the answer sheet image to move between pages. The current position is shown as "Page 1 of 20" (for example).
Visited Pages Indicator
A progress bar tracks which pages you've viewed. This is important because you must visit all pages before you can finish the evaluation. If you haven't viewed every page, you'll see a warning: "Please visit all pages before finishing evaluation."
Keyboard Shortcuts
Speed up your workflow with these keyboard shortcuts:
| Shortcut | Action |
|---|---|
| Q or Left Arrow | Open Question Paper |
| A or Right Arrow | Open Answer Key |
| I | Open Instructions |
Rejecting an Answer Book
Sometimes an answer book cannot or should not be evaluated. MAPLES OSM lets you reject it with a reason.
How to Reject
- Duplicate Answer Sheet
- Blank Answer Sheet
- Already Evaluated by me
- Incomplete Answer Booklet
- Wrong Medium
- Incorrect Subject
- Damaged Paper
- Other — Enter a custom reason in the text field
Once rejected, the answer book's status changes to Rejected and it will be reassigned or handled by administration.
Reporting Malpractice
If you discover signs of malpractice while evaluating, you can report it without stopping your evaluation.
How to Report Malpractice
- Writing the answer revealing the identity of the candidate (1H)
- Writing songs, stories, poems or drawings irrelevant to the subject (1J)
- Writing any appeal to Examiner / Giving contact details (2H)
- Writing filthy / indecent / vulgar words or sketching obscene figures (4A)
- Other Malpractice / Suspected Malpractice — Enter a custom description
Important: Reporting malpractice does not stop your evaluation. You can continue marking the answer book and submit it as usual. The malpractice report is attached to the answer book for administrative review.
Completing the Evaluation
Step 1: Visit All Pages
Make sure you've navigated through every page of the answer book. The visited pages indicator should be fully filled.
Step 2: Click "Finish Evaluation"
Once all pages are visited, the "Finish Evaluation" button (green) appears at the bottom of the right panel. Click it to proceed to the confirmation screen.
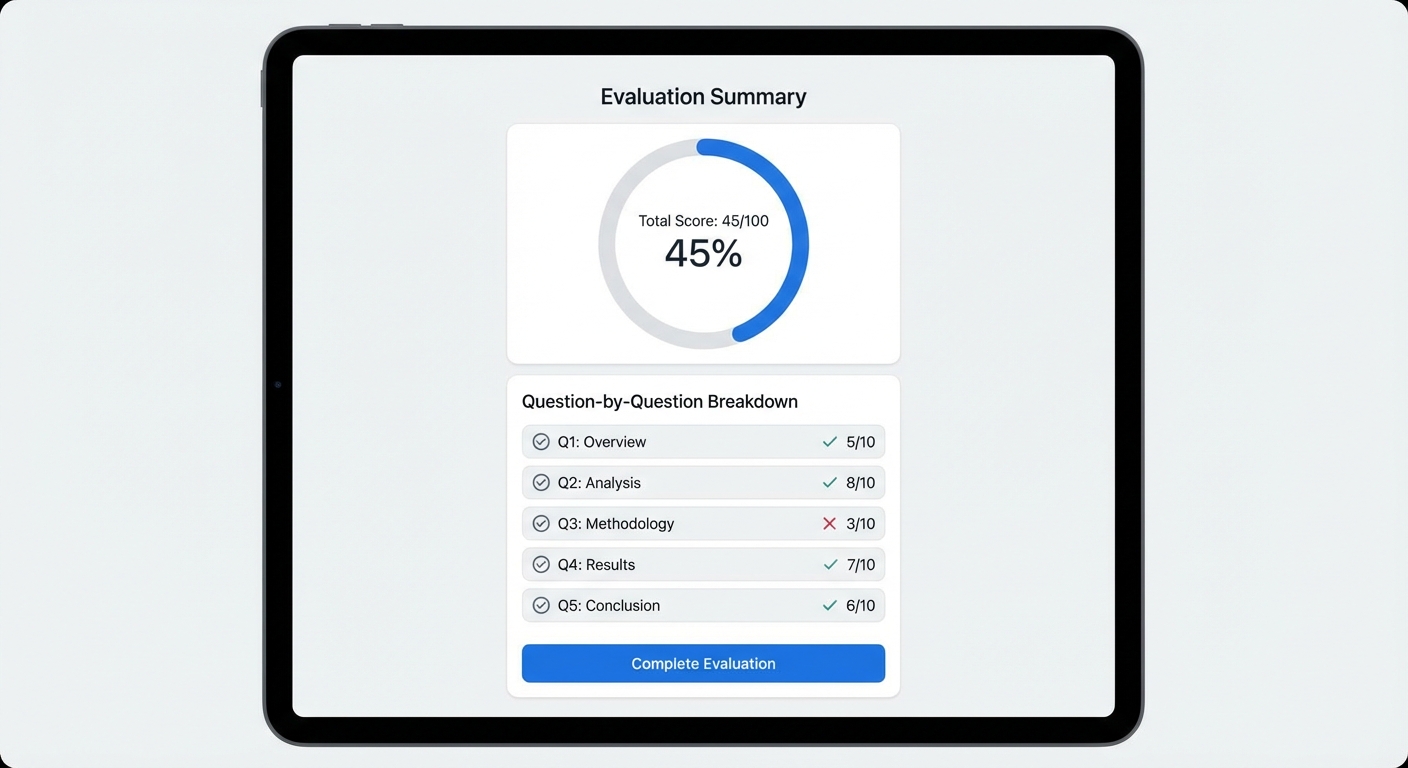
Step 3: Review on the Confirmation Screen
The Answer Sheet Preview page shows a summary of your evaluation:
Step 4: Submit
Once submitted, the answer book moves to Completed status and becomes available for moderator verification.
Handling Warnings
As you evaluate, moderators may review your completed work and issue warnings. When this happens:
Each warning card shows:
Warnings are automatically marked as read when you close the dialog. Take these warnings seriously — they help you improve your evaluation accuracy.
Tips for Efficient Evaluation
What's Next?
If you're also a moderator (or want to understand the verification process), head to Part 3: Moderation & Verification to learn about moderation, verification, issuing warnings, and reallocation.
*This guide is part of a 3-part series:*
Related Reading
Ready to digitize your evaluation process?
See how MAPLES OSM can transform exam evaluation at your institution.